

What to Expect When Hiring Wall Witches
Having workers in your home can be stressful. Here’s a breakdown of what to expect so there are no surprises and you can feel prepared.
Here’s a breakdown of what you can anticipate:
Before the Painting Begins
Initial Consultation & Estimate: Wall Witches will visit your home to assess the project, discuss your preferences, and provide an estimate.
Color & Finish Selection: We can offer guidance on choosing colors, finishes, and types of paint based on your needs.
Scheduling the Job: Wall Witches will set a timeline and inform you of how long the job will take.
Preparation Instructions: We will ask you to take down wall decor, and clear the space to make it easier for us to move around. We can move pieces of furniture for you.
During the Painting Process
Surface Preparation: Wall Witches will clean walls, repair holes or cracks, sand surfaces, and apply primer if necessary.
Protection: We’ll use drop cloths and plastic to protect floors, furniture, and trim.
Efficient & High-Quality Work: Expect skilled brushwork, even coats, and no drips or splatters.
Minimal Disruption: We always aim to work efficiently while keeping noise and mess to a minimum.
Communication: We will always keep you updated on progress and any unexpected issues (e.g., hidden damage that needs repair).
After the Painting is Done
Cleanup & Restoration: Wall Witches will remove tape, drop cloths, and any debris, leaving your space clean.
Final Inspection: A walkthrough ensures everything meets your expectations, and any necessary touch-ups are completed.
Drying Time & Recommendations: We will advise on how long to wait before touching or cleaning freshly painted walls.
What You Should Do
Communicate any specific expectations or concerns before the job starts.
Ensure access to necessary areas (clear pathways, remove obstacles).
Ask about the type of paint being used and any maintenance tips.
Do a final check before making the last payment to ensure you're happy with the results.

How to Choose the Right Wallpaper for Installation
How do you go about choosing the right wallpaper for your space? With so many options available, making a decision can be overwhelming. Here we’ll explore some helpful tips to guide you through the process of selecting the perfect wallpaper for your home.
Wallpaper has made a huge comeback in interior design over the past few years. Today, wallpaper offers a stunning range of styles, patterns, and textures that can completely transform a room. But how do you go about choosing the right wallpaper for your space? With so many options available, making a decision can be overwhelming. Here we’ll explore some helpful tips to guide you through the process of selecting the perfect wallpaper for your home.
1. Consider the Room’s Function and Size
Start by thinking about the purpose of the room. Is it a high-traffic area like the hallway or kitchen, or a more relaxed space like a bedroom or living room? The function of the room will affect the type of wallpaper you choose.
High-Traffic Areas: For spaces like kitchens, bathrooms, and hallways, go for durable wallpapers that are easy to clean. Vinyl wallpapers are a great option as they are moisture-resistant and washable.
Low-Traffic Areas: Bedrooms, offices, and dining rooms offer more flexibility. You can opt for more delicate, textured, or artistic designs since these spaces aren’t exposed to as much wear and tear.
Additionally, the size of the room plays a major role in your choice. If you're working with a small room, light-colored wallpapers or subtle patterns will help make the space feel larger. For larger rooms, you can experiment with bolder patterns, darker shades, or even accent walls.
2. Match the Wallpaper to Your Style
Wallpaper can set the tone for the entire room. Whether you prefer a modern, traditional, minimalist, or eclectic style, there’s a wallpaper out there that can reflect your taste.
Modern Style: Opt for wallpapers with geometric shapes, stripes, or metallic finishes. Minimalist rooms often look great with solid colors, subtle textures, or simple designs.
Traditional Style: Floral, damask, or paisley patterns work well in spaces with traditional decor. Vintage-inspired wallpapers also complement classic furniture pieces.
Eclectic Style: If you're someone who enjoys mixing and matching different design elements, try wallpapers with bold prints, animal patterns, or artistic illustrations.
It’s important to consider how the wallpaper will interact with the other elements in your room, such as furniture, curtains, and flooring. The wallpaper should harmonize with the rest of your decor, not clash with it.
3. Choose the Right Color Palette
The color of your wallpaper can dramatically affect the mood of a room. Lighter shades, such as pastels or whites, make a room feel airy and spacious, while darker hues can add warmth and create a cozy atmosphere.
Neutral Colors: Shades of beige, gray, and white are timeless and versatile. Neutral wallpapers work well in almost any room and allow you to play with bolder furniture and accent colors.
Bold Colors: If you want to make a statement, choose vibrant colors like navy blue, emerald green, or deep red. Just be sure to balance these with neutral furniture and accents to prevent the room from feeling too overwhelming.
Metallic Finishes: Gold, silver, and other metallic tones can add sophistication and a touch of luxury to a room. Metallic wallpaper can be perfect for feature walls or accent areas.
4. Think About Texture
The texture of the wallpaper can play a huge role in how it feels in the room. Some wallpaper types have raised or embossed patterns, while others may feature subtle textures like linen or silk. Texture can add depth to a room and enhance the tactile experience.
Textured Wallpaper: If you're looking to create a more luxurious, elegant feel, textured wallpaper such as grasscloth, silk, or linen can bring a sophisticated touch to your space.
Flat Wallpaper: For a more modern or understated look, flat wallpapers (without raised patterns) are a great choice. These types of wallpaper allow the color and pattern to stand out more, providing a sleek and contemporary finish.
5. Consider the Installation Process
Not all wallpapers are created equal when it comes to installation. Some are peel-and-stick, while others require paste or glue. If you're looking for something more temporary, peel-and-stick wallpaper is a great option it's easier to apply and remove without leaving major damage behind. Traditional wallpapers may require a bit more effort but tend to last longer.
Before making a decision, think about how long you want the wallpaper to stay up. If you're renting or just want a temporary change, peel-and-stick wallpaper might be the best choice. For a more permanent solution, opt for wallpapers that need paste or glue.
6. Budget Considerations
Wallpaper can vary significantly in price depending on the material, brand, and design. High-end wallpapers made from materials like silk or grasscloth tend to be more expensive, while vinyl or non-woven wallpapers are often more affordable.
Before making your final choice, establish a budget for your wallpaper project. There are many wallpaper calculators you can find online to give you a sense of how many rolls you may need and what the cost will be.
7. Try Out Samples First
Before committing to a full room of wallpaper, it’s helpful to try out samples. Most wallpaper stores offer sample sizes, so you can see how the wallpaper looks on your walls in different lighting conditions. This step can help you avoid surprises and ensure that you’re happy with the choice.
It’s also a good idea to test the wallpaper alongside your room’s furniture, curtains, and flooring. This way, you can visualize how everything will come together before making a final decision.
Conclusion
Choosing the right wallpaper can completely transform the look and feel of a room, so it’s important to take your time and consider all factors like room function, style, color, texture, and budget before making a decision. Whether you’re going for a statement wall or covering the entire room, wallpaper has the potential to add personality, warmth, and sophistication to your home. With these tips in mind, you’ll be well on your way to selecting the perfect wallpaper for your space! We’ll take care of the rest!
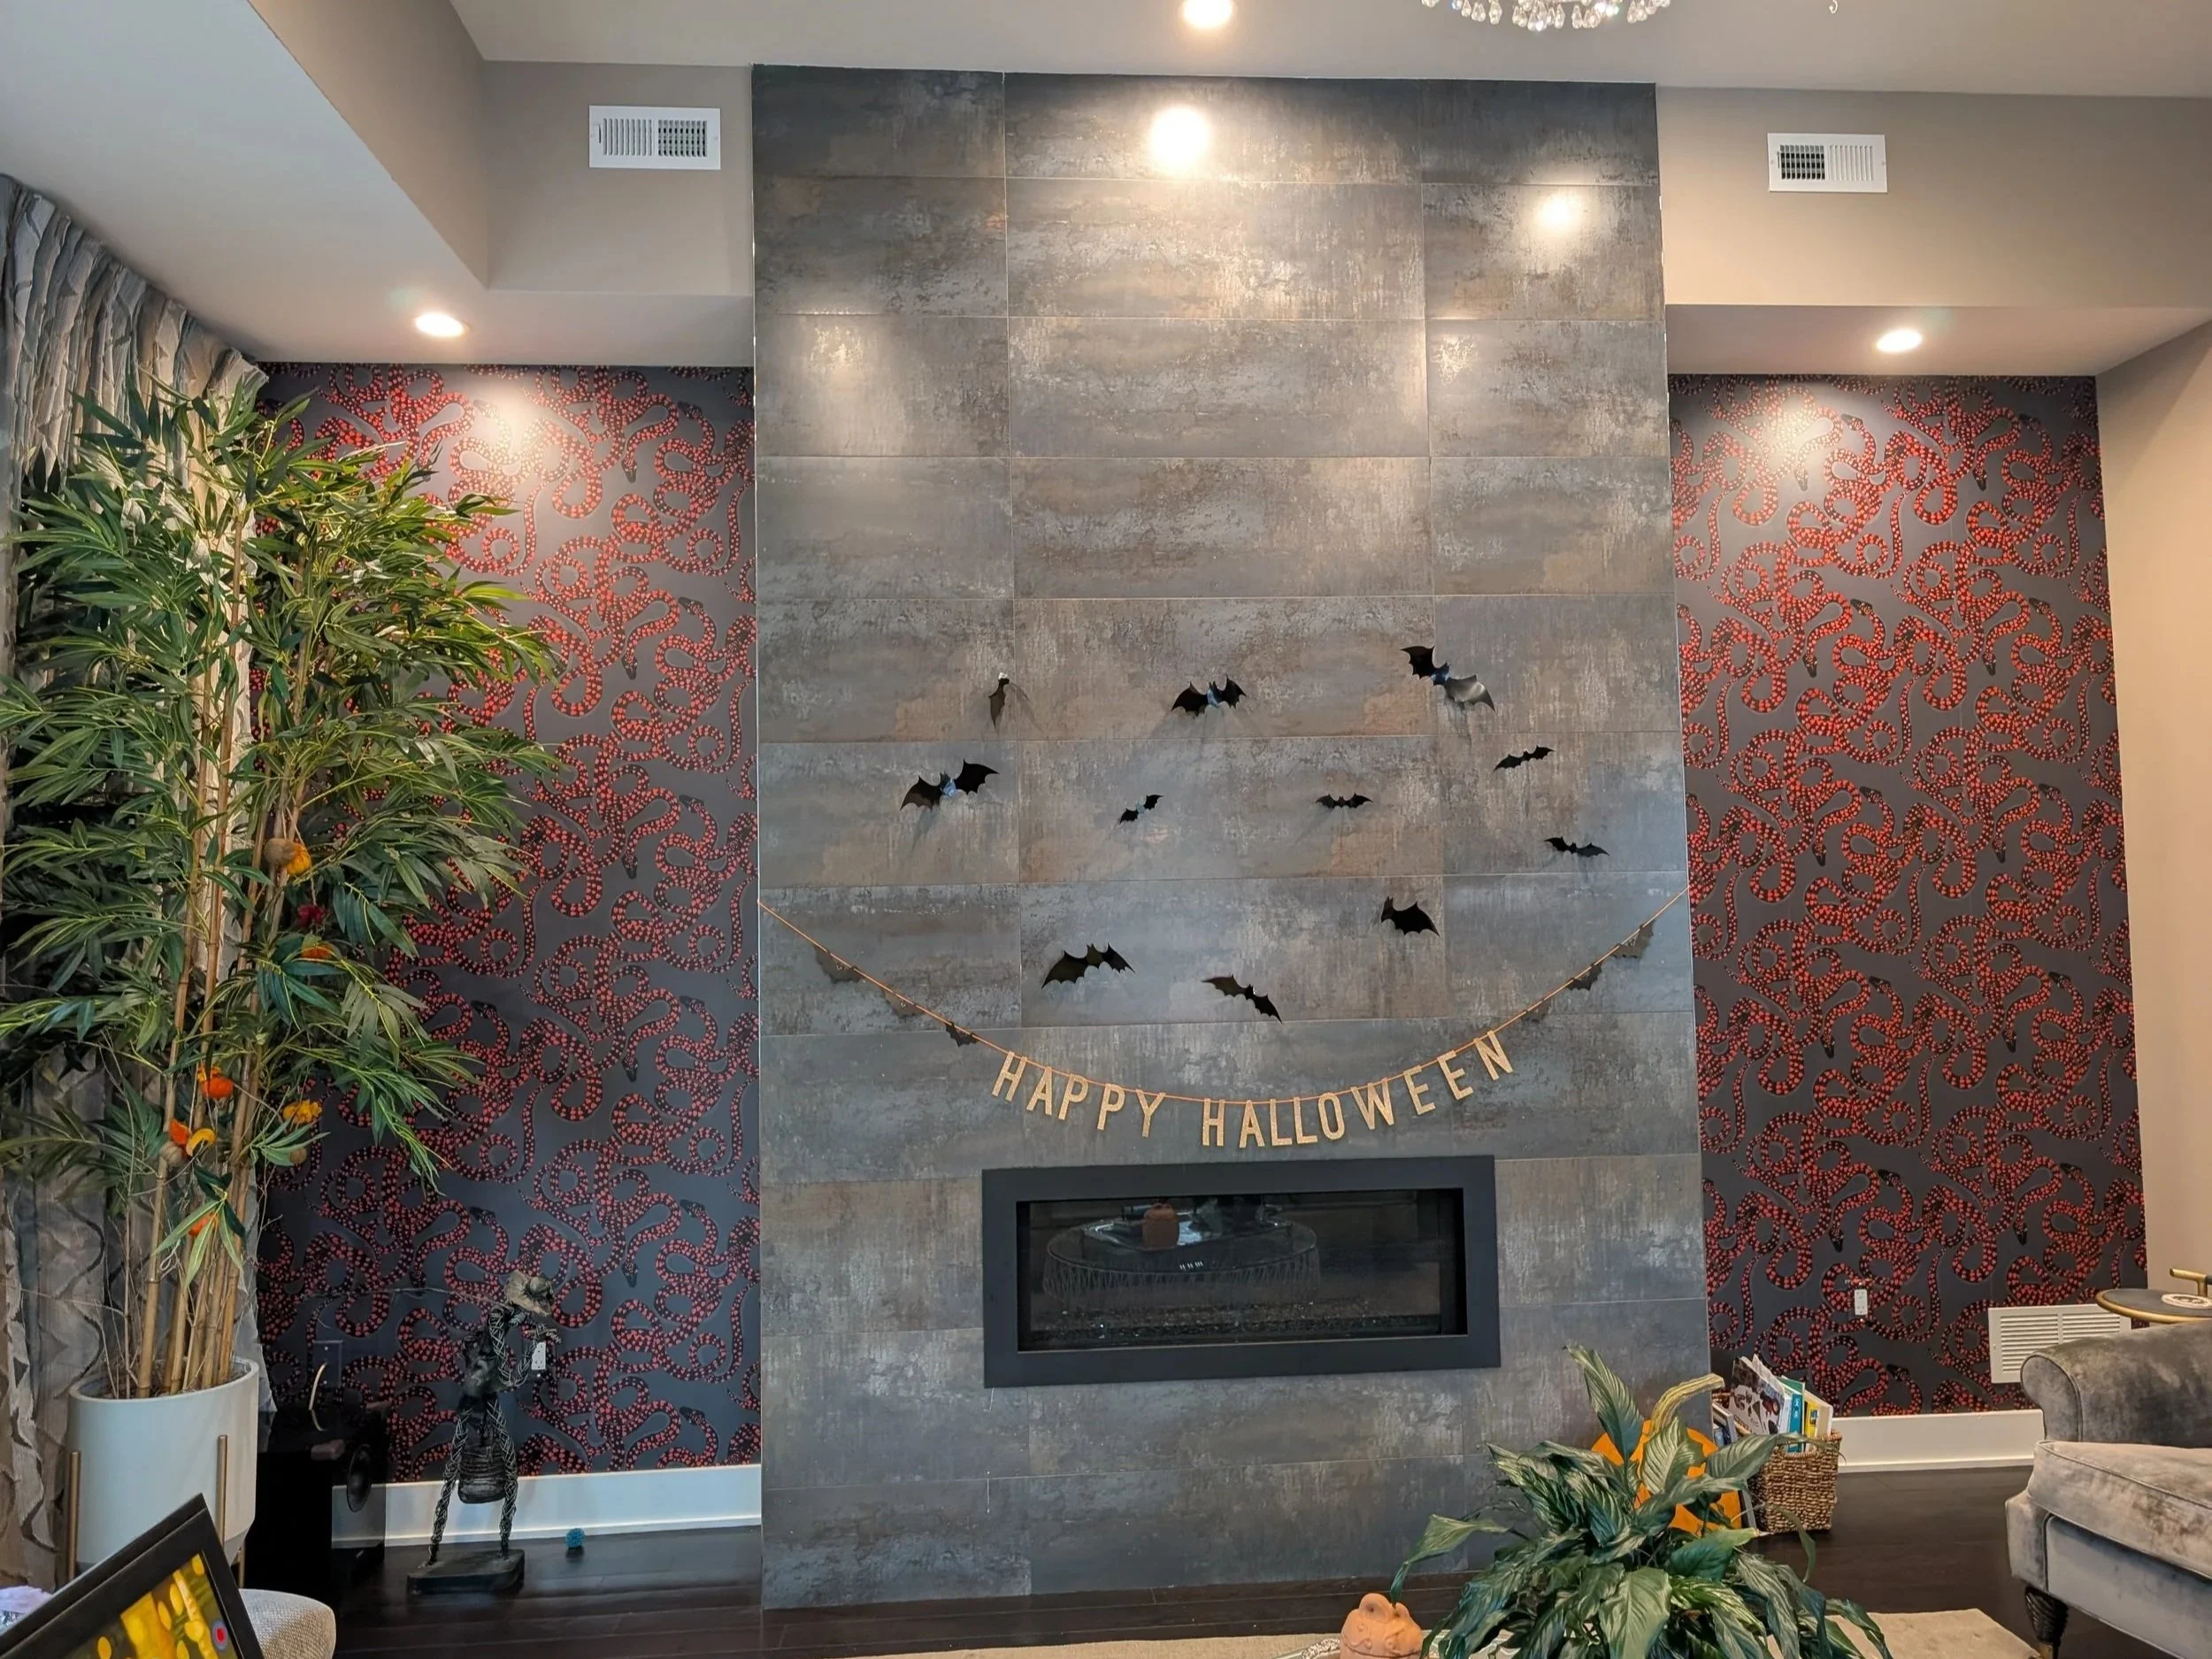
Peel and Stick vs. Traditional Wallpaper: Which Is Right for Your Home?
Wallpaper has made a real comeback over the past several years, and a big part of that is thanks to peel and stick options making the whole idea feel a lot more approachable. But approachable doesn't always mean right for every wall, and we get asked pretty often which type someone should choose. Tt really all depends on the room, the wall, and what you're hoping to get out of it.
Wallpaper has made a real comeback over the past several years, and a big part of that is thanks to peel and stick options making the whole idea feel a lot more approachable. But approachable doesn't always mean right for every wall, and we get asked pretty often which type someone should choose. Tt really all depends on the room, the wall, and what you're hoping to get out of it.
What peel and stick actually is
Peel and stick wallpaper has an adhesive backing built right in, similar to a giant sticker. There's no paste involved, and in theory it can be removed and repositioned if you don't get it right the first time. It's popular for rentals, for people who like to change things up every few years, and for smaller accent projects like a single wall.
What traditional wallpaper actually is
Traditional wallpaper is hung using paste, either pre-applied and activated with water, applied to the back of the wallpaper, or to the wall itself, and it bonds directly to a properly prepared wall. It's a more involved installation process, but it tends to lay flatter, last longer, and handle pattern matching across seams more precisely, especially with larger or more intricate designs.
Where peel and stick makes sense
If you're renting and need something removable, peel and stick is really the only option worth considering. It also works well for smaller, low commitment projects, like a powder room, a closet, or a single accent wall, where you want a strong visual statement without a long term installation. It's a reasonable choice if you expect to want a change again in a few years.
Where traditional wallpaper makes more sense
For larger rooms, high traffic areas, or spaces where you want the wallpaper to be a long term feature, traditional wallpaper tends to hold up better and look more polished over time. Peel and stick can struggle with seams lifting at the edges, especially in humid rooms or on walls that aren't perfectly smooth, which is a common situation in older Philadelphia homes. Traditional wallpaper, properly installed over a well prepped wall, doesn't have that problem.
The wall itself matters more than people expect
This is the part that surprises a lot of people. Peel and stick relies on a smooth, clean surface to adhere properly, and older walls with texture, old paint layers, or plaster imperfections don't always cooperate. In those cases, traditional wallpaper installed over a proper liner or primer often actually goes up easier and looks better than peel and stick would, even though it sounds like the more complicated option.
Our honest take
We install both, and we don't have a bias toward one over the other. What we do have an opinion on is matching the type to the wall and the project. A rental accent wall and a dining room in a hundred year old rowhome are two completely different situations, and the right wallpaper for one usually isn't the right choice for the other.
If you're trying to decide which direction makes sense for your space, send us a few photos and let's talk it through!

Choosing the Right Paint Finish and Color
Choosing the right paint finish and color is one of the most impactful decisions you'll make when decorating your home. If you're unsure about what paint finish or color to go for, don't worry—we’ve got you covered with this comprehensive guide to help you make informed choices for your interior painting project.
Choosing the right paint is one of the most impactful decisions you'll make when decorating your home. Not only does it set the tone for the entire room, but it also affects how the space feels, how easy it is to maintain, and how light and space are perceived. If you're unsure about what paint finish or color to go for, don't worry we’ve got you covered with this comprehensive guide to help you make informed choices for your next interior painting project. We’re also always here to bounce ideas off of and help you make the right choices!
Step 1: Understand Different Paint Finishes
Before choosing a color, it's essential to understand the different paint finishes, as each one has a unique look, durability, and maintenance level. Here are the most common paint finishes and their best uses:
Flat:
Look: Non-reflective, velvety finish
Durability: Least durable
Best for: Ceilings, walls with imperfections, and low-traffic areas like bedrooms
Pros: Hides imperfections well and gives a sophisticated, muted look
Cons: More difficult to clean and prone to scuffs and stains
Matte
Look: Very slight sheen, luxurious finish
Durability: Durable, washable
Best for: Walls with some imperfections as it tends to hide these well, and areas like bedrooms, living rooms, dining rooms
Pros: Hides imperfections well and gives a sophisticated, deep and rich look
Cons: More difficult to clean and prone to scuffs and stains, however Wall Witches generally uses Sherwin Williams Emerald which is formulated specifically to be easier to clean
Eggshell/ Satin:
Look: Smooth, velvety sheen
Durability: Very durable and easy to clean
Best for: Kitchens, bathrooms, and high-traffic areas like corridors and children's rooms
Pros: Reflects more light, making it a great option for smaller or dimly lit rooms
Cons: Reflects imperfections on walls, so surfaces need to be smooth
Semi-Gloss:
Look: Glossy but not overly shiny
Durability: Highly durable and easy to clean
Best for: Trim, doors, cabinets, and areas prone to moisture
Pros: Excellent for trim and doors which may need frequent cleaning
Cons: Highly reflective, so it can highlight imperfections on walls, which is why its mostly used for trim
High-Gloss:
Look: Very shiny and reflective
Durability: Most durable and easy to clean
Best for: Accents, trim, and cabinetry
Pros: Extremely durable and easy to maintain
Cons: Shows every flaw, and the high shine can be overwhelming if overused
Step 2: Choosing the Right Color
Once you’ve decided on the finish, the next major step is selecting a color. The right color can dramatically transform the ambiance of a room. Here are some key considerations when picking the perfect paint color:
Consider the Room's Function:
Living Room or Dining Room: These spaces are great for warmer, inviting colors like soft neutrals, earth tones, or rich blues and greens. These hues promote relaxation and comfort.
Bedroom: Soft tones like light blues, lavenders, or cool greys create a calm and serene environment ideal for sleep and relaxation.
Kitchen: Bright and fresh colors like whites, yellows, or soft greens work well here, creating an energizing atmosphere.
Bathrooms: Light, airy colors like soft blues or greens are a popular choice for bathrooms. They evoke a clean, spa-like feel.
Consider Natural Light:
Natural light can greatly affect how your paint color looks in a room. A color that looks great in a well-lit space may appear different in a room with minimal natural light.North-facing rooms tend to have cooler, more subdued light, so warm colors like beige, peach, or warm greys can help balance this out.
South-facing rooms have warmer, brighter light, and cooler tones like blues, greens, and greys work well here.
Mood and Ambiance:
Think about the mood you want to create in the room. Soft pastels tend to create a calm and peaceful ambiance, while bold hues like deep reds, yellows, or oranges can inject energy and excitement.
For a timeless and sophisticated feel, consider neutrals like whites, beiges, and greys. These colors work with almost any decor and can create a clean, elegant look.
Test Paint Samples:
Always test paint samples in the room before committing. Paint a small area on the wall and observe how the color changes with different lighting conditions throughout the day.
Create a Color Scheme:
If you’re painting multiple rooms, consider how the colors will flow from one space to another. Create a cohesive look by using complementary colors or varying shades of the same color for different rooms.
Step 3: Other Considerations When Choosing Paint
Room Size and Shape:
Dark colors tend to make a room feel smaller and more intimate, while light colors can make a space appear larger and more open.
If your room is small or lacks natural light, opt for light, reflective colors to make it feel airier and more spacious.
Accent Walls:
If you want to add a pop of color or create a focal point in a room, consider painting one wall in a bold color. Accent walls can be especially effective in living rooms or bedrooms.
Quality of Paint:
Wall Witches prefers to use high quality paint. It may cost more initially, but the durability and finish it provides will be well worth the investment in the long run.
Conclusion: The Perfect Combination of Paint Finish and Color
Choosing the right paint finish and color for your interior is essential to creating a home that reflects your personal style while being functional. The key is to consider the purpose of the room, the natural light it receives, the mood you want to set, and the ease of maintenance for your chosen finish. Once you understand the characteristics of different finishes and how colors affect the atmosphere, you’ll be well on your way to creating a beautiful, cohesive space that you'll love for years to come. Wall Witches is here to discuss color and finish options and help you make the right choice!
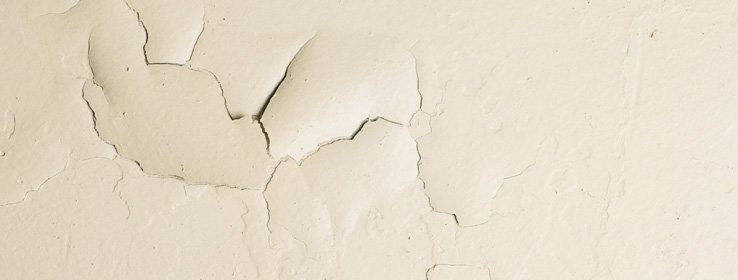
Signs It's Time to Repaint: A Guide for Philly Homeowners
Most people don't think about repainting until something forces the issue, like getting ready to sell, hosting a big event, or finally getting tired of staring at a color they never really liked. But paint does more than look nice. It's also protecting your walls, and there are some clear signs that it's due for a refresh even if you haven't consciously noticed them yet.
Most people don't think about repainting until something forces the issue, like getting ready to sell, hosting a big event, or finally getting tired of staring at a color they never really liked. But paint does more than look nice. It's also protecting your walls, and there are some clear signs that it's due for a refresh even if you haven't consciously noticed them yet.
Fading that you only notice in certain light
Paint fades gradually, which means most people don't clock it happening in real time. It usually shows up when you move a picture frame or a piece of furniture and see a noticeably brighter patch of the original color underneath. If you're seeing that, the rest of the wall has likely faded more than you realized.
Chalking on exterior or sun-exposed surfaces
If you run your hand along a painted surface and it leaves a powdery residue on your fingers, that's called chalking, and it's a sign the paint's binder is breaking down. It happens most often on surfaces that get a lot of direct sun exposure, but exposure and time both play a role.
Cracking, peeling, or bubbling
These are the more obvious signs, but they're often dismissed as small cosmetic issues rather than what they actually are: signals that moisture, poor adhesion, or old paint layers are causing real problems underneath. In Philadelphia's older housing stock, this is especially common around bathrooms, kitchens, and any wall that's dealt with a leak at some point, even a minor one that got fixed a while ago.
Marks that won't come out anymore
Scuffs, fingerprints near light switches, crayon from a kid who's since grown out of that phase. Most paint can handle a reasonable amount of cleaning, but there's a point where a wall has just absorbed too much life to fully bounce back, especially with flatter finishes that aren't as washable to begin with.
You're noticing every flaw in the room
This one's less technical, but it's real. If you find yourself staring at a wall and noticing every imperfection, every slightly different patch from an old repair, every spot where the color looks a little off, that's usually a sign you're mentally ready for a change, even if the wall itself could technically survive another year or two.
It's been more than 7 to 10 years
Even paint that looks fine on the surface has a working lifespan, especially in high traffic rooms like kitchens, hallways, and kids' rooms. If it's been a decade since a room was last painted, there's a good chance the finish has worn down in ways that aren't obvious until you compare it to something freshly painted.
What to do next
If a few of these are hitting close to home, it's probably time to start thinking about a refresh. We're always happy to come take a look, tell you honestly whether a room needs a full repaint or just some touch ups, and help you figure out colors and finishes if you want a change rather than a repeat of what's already there.
Reach out for a free consultation and we'll help you figure out what your space actually needs.
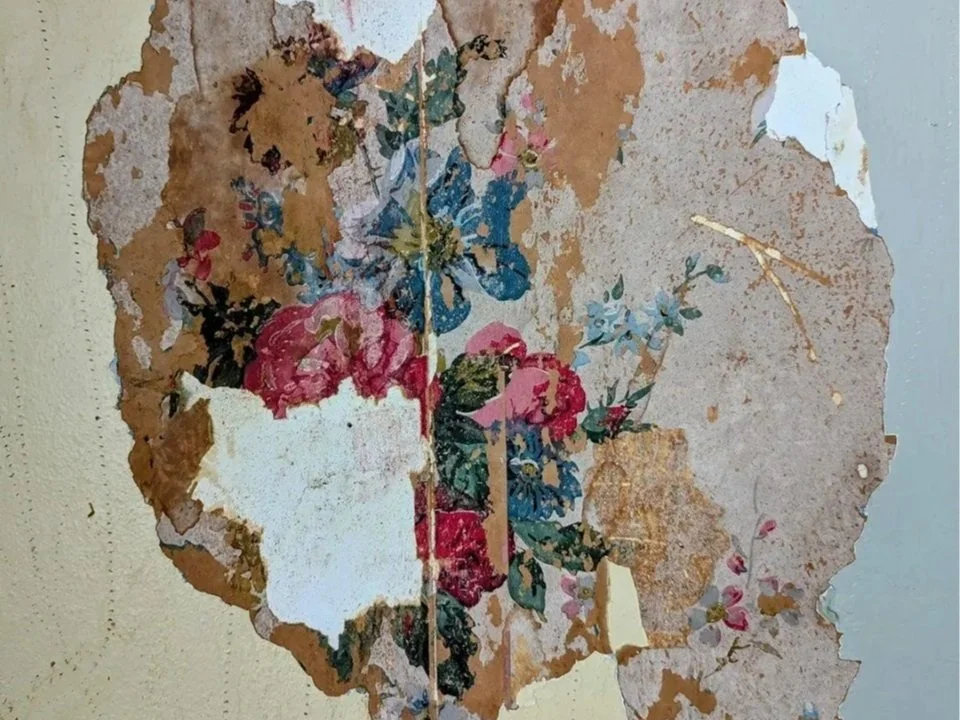
Removing Old Wallpaper Without Damaging Your Walls
There's a specific kind of dread that comes with pulling a corner of old wallpaper and watching a chunk of drywall paper come off with it. If that's happened to you, you're not alone, and it's usually a sign that the wallpaper was put up without a liner, or that it's been there long enough to bond aggressively with the wall underneath.
There's a specific kind of dread that comes with pulling a corner of old wallpaper and watching a chunk of drywall paper come off with it. If that's happened to you, you're not alone, and it's usually a sign that the wallpaper was put up without a liner, or that it's been there long enough to bond aggressively with the wall underneath.
Wallpaper removal has a reputation for being a nightmare project, but most of that reputation comes from people using the wrong method for the type of wallpaper and wall they're dealing with. Here's how to actually approach it.
Figure out what kind of wallpaper you're removing
Not all wallpaper comes off the same way. Vinyl and peelable wallpapers are usually the easiest, since the top layer can often be peeled away by hand, leaving just the backing paper on the wall. Traditional pasted wallpaper, especially anything installed before the 90s, tends to be glued directly to the wall or plaster with very little forgiveness. Knowing which one you're dealing with before you start saves a lot of frustration.
Test a small section first
Before committing to a whole wall, peel a corner in an inconspicuous spot to see how it releases. If it comes away cleanly, you might be able to dry strip most of the paper by hand. If it tears and leaves backing behind, you're going to need to wet the wall to break down the adhesive, and it's worth knowing that before you're three hours into a room.
Score before you wet
For wallpaper that isn't coming off easily, a scoring tool creates tiny perforations that let water or removal solution reach the adhesive underneath. Skipping this step is one of the most common reasons people end up soaking a wall for twenty minutes with barely any progress to show for it. The water needs a way in.
Use the right solution, and give it time to work
A mix of warm water and fabric softener, or a commercial wallpaper removal solution, softens the adhesive so the paper releases instead of tearing. The mistake most people make is not giving it enough time to soak in before scraping. Rushing this step is exactly what leads to gouged drywall, because you end up forcing a scraper against paper that hasn't actually loosened yet.
Scrape at a low angle
Once the adhesive has softened, a wide putty knife held at a shallow angle against the wall lifts the paper without digging into the surface underneath. Steep angles are what cause gouges, especially on drywall, which is much softer than old plaster.
Wash the walls afterward
Even after the paper is off, there's usually a layer of leftover adhesive on the wall. This needs to come off too, or it'll interfere with paint or new wallpaper down the line. A sponge and warm water, with a little extra removal solution if needed, takes care of it.
Prime with Zinsser Gardz
It’s a safe bet to seal the walls after cleaning, as you may not have removed every last bit of glue residue. Sealing the walls with a problem surface sealer primer, or an oil or shellac primer will ensure that the paint will adhere with no issues.
When it's worth calling in help
If you're dealing with multiple layers of old wallpaper, plaster walls that are already fragile, or a wall that's clearly not cooperating no matter what you try, it's often faster and cheaper in the long run to have someone experienced handle it. We've removed our fair share of stubborn, decades-old wallpaper in Philadelphia homes, and we know how to read a wall before we start pulling at it.
If you're planning new wallpaper or paint and need the old layer gone first, reach out for a free consultation. We're happy to take a look and tell you honestly what you're working with.